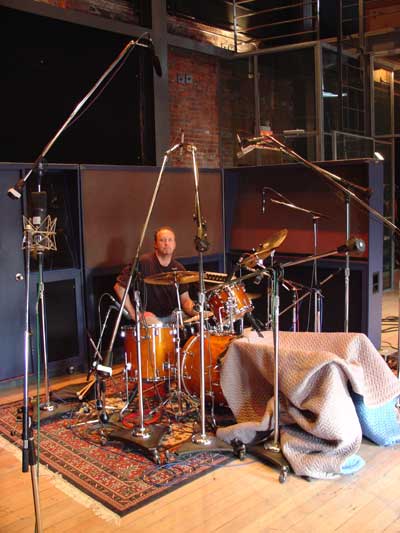
Studio Drummer – Somehow We Got An Album Out Of This Mess

This track was recorded in this arcane nightmarish fashion, check it out:

This producer (who shall remain nameless) insisted that we trigger drum sounds off of real drums.  Back then the triggering had a lot of latency and was inconsistent and problematic to say the least. That was the first massive distraction when trying to play…but it gets way better!

He wanted no toms on the initial bed.  Toms were to be fully produced and overdubbed later.  So he wanted groove, kick, snare, hat and cymbals.  So I had to play and imagine (or should I say over-think) where I would play a tom fill and what that would be.  Zero spontaneity!  He also said that I couldn’t use stand-in toms such as Simmons toms that were not producing any sound, just stand-ins so it would feel a bit more natural.  The added problem?

We were recording bass and drums as a bed  track, together, on the whole album.

Real time scenario;

I would come to the end of a phrase and try not to over-think the fact that I had no toms and I would leave a gap in the bed performance knowing that we’d be doing a tom overdub in that spot.

So get this,… I would be playing and hoping that the triggers were working properly going to the Linn drum (young folks do your homework lol) and when I’d come to the end of an 8 bar section for example I’d stop for 2-3 beats to accommodate the ‘phantom tom overdub’ yet to be, but one problem…

The bass player is playing with me live, doing a big budget session and of course there’s pressure there.  He hears me stop, ..completely stop at the end of the 8 bar section and thinks that I’ve made a mistake so he’s thrown so he stops.  After a while he understands that I’m stopping because I’m leaving space for a tom overdub but that still is a massive distraction to him as the session goes on, trying to lay down a solid good feeling track!

I swear to God that I can’t believe that we got anything that was usable and this was way before digital editing.  It still had to groove.  This was going down to 2 inch tape.  So it had to be believable.  But you couldn’t punch in on 2 inch tape unless you had a large break in the music, so it was on!  It’s a truly different world now a days.  Those kind of extreme pressure days are mostly over but they were great experience and trial by fire.

We had to work through the pressure and the ridiculous impediments put on us by this producer,.. but still try to groove and do something that had attitude and merit.

How is that for an old school recording nightmare?


All 100% true.  Just another crazy experience in the studio…  Ocean Sound, Vancouver


Share : facebooktwittergoogle plus
pinterest

Studio Drummer – Hi Hat Can Be A Very Musical Instrument

The hi hat is a ‘musical instrument’ so treat it like one, approach it like one.


*FIRST RULE IS DO NOT BOUNCE YOUR FOOT ON THE HI HAT WHEN YOU ARE PLAYING A CONSISTENT CLOSED OR SEMI CLOSED HI HAT PHRASE.*


When we were touring with Toto I got the chance to stand at the back of the stage and watch Jeff Porcaro play.  The stage was at about my head level since there were risers toward the back of the stage so my head level was right at his foot level.  I’ve always loved his textures. He was a beautiful studio player with great nuances in his playing, truly one of the all time greats.  His kick foot was a slamming heel up technique!  It was a beautiful fat kick presence but his hi hat foot?


Heel down and his foot was dead still!


If he was playing a closed or semi closed pattern on the hat his foot never moved unless he was making very subtle and specific adjustments.  That was a great lesson to me.  I also got to meet Jeff and hang a bit.  He was an awesome guy, very humble!  He also gave me the greatest drumming compliment of my entire life.  He said to me “your time is a motherfucker man!”  We lost a lot of music they day we lost him.


So what you’re doing by bouncing your foot is constantly changing the tension of the hats, which is affecting the sound and emotion that you’re producing. 


Think of a piano player. You don’t see a piano player stomping on the dampening pedal or keeping time on it either.  The pedal serves a specific function on both instruments, in our case it’s tension and cymbal decay. 

Of course if you’re playing something that involves opening or closing or if it’s a foot hat pattern then this rule doesn’t apply.


But creating a high end, very consistent kick, snare and hi hat groove involves being very much aware and in control of the hi hat subtleties and texture!  The same of course applies kick and snare and to ride cymbal technique and all the subtleties surrounding that as well.


I’d encourage you to study some great players here. Steve Gadd is another outstanding example. Listen to the use of the hi hat and his command of the instrument.  Also listen to the great players use of tip and shank techniques utilizing the sticks to create different groove soundscapes.


Share : facebooktwittergoogle plus
pinterest

Studio Drummer – Studio Level Specifics

*PLAYING SIDE STICK AT THE STUDIO LEVEL IS ALSO CHALLENGING.* 


Again, the consistency of the sound that you’re creating is the issue.  There are several tricks that help in this. 


What you don’t want is for the stick to be even slightly changing position.

The stick is turned around so that the butt end is being used to strike the rim.  The slightest little movement will create a distinctly different tone and you don’t want that.


The first technique I use is to anchor the palm of my hand on the head itself.  By anchoring the palm it greatly decreases the amount of movement in my position.  The only disadvantage I find is that it can be harder to get enough impact.  When that is the issue I use this technique.


Some side stick tracks require more aggression than others.  Working with the producer and engineer I strike the rim and move the stick to different positions and ask them their preference in tonality. 

Once the optimum position is located I take a pen (pencil if you prefer except pencil obviously wears off quickly) and I draw a circle right around the stick at the exact point of impact with the rim.  That way I can see the position and quickly adjust it if I need to.


The third trick which I don’t use but I have seen other prominent drummers use is to trace the stick position onto the snare head like you would with tracing paper.  That way the exact stick position can also be seen clearly.


*PLAYING EFFECTIVE HI HAT…*


is one of the most un-talked about art forms surrounding the drum kit.  I like to make the comparison of someone thrashing out sloppy 8th notes on the hats all the way up to the mastery of someone like Stuart Copeland, one of the all time great hi hat artists in pop music!  


The subtleties and level of emotion and sheer expression that he achieves out of just a hi hat is truly where the bar has risen to this day!  


So the point is this. 


The hi hat is a ‘musical instrument’ so treat it like one, approach it like one

Share : facebooktwittergoogle plus
pinterest

Studio Drummer – Sweet Spot

*YOU WANT TO BE VERY CONSISTENT STRIKING THE DRUM IN EXACTLY THE RIGHT SPOT.*


Every drum has a ‘sweet spot’.  This is the spot on the drum where the drum speaks to its utmost ability.  Use your ear and find all of your drum’s sweet spots and practice hitting them every time.  It’s more difficult than you might think!  It’s usually the center of the drum or slightly off center.  Use and develop your ear!


Where does the stroke sound best to you?


*AS A SESSION PLAYER YOU’LL BE ASKED TO STRIKE YOUR SNARE INCLUDING A CERTAIN AMOUNT OF RIM.*


This means striking the drum but also including a touch of the rim, which creates a tremendous amount of crack and attitude out of the drum. 

This is tricky but you need to practice this. 

Practice the same consistency of your stroke but this time your stroke will be off-centre, slightly to the side of the drum and catching consistently the same amount of rim. You don’t want more rim and then less rim etc. 

You need to develop a style in this area that gives you consistency and attitude that you can pull out immediately if a producer requests it.


On the issue of weight;


*YOU DON’T WANT TO OVER-HIT EITHER!*


Drums tend to choke sonically when they are over-hit.  You can hear this very clearly with snares and toms.  You want to strike the drum with enough impact to excite the drum and make it sing but not to over-hit the drum and choke it.

Share : facebooktwittergoogle plus
pinterest

Studio Drummer – Stroke Weight

*THE KEY IS THE SOUNDS THAT WE CREATE FOR THE MICROPHONES TO ‘HEAR’!*


A good fulcrum with a good release, which means allowing the stick to rebound off the drum head allowing the head to ring and decay freely is the starting point that we’re looking for. 


This is also true for cymbal work.  You don’t want to be pressing the stick into the cymbal but you should be striking the cymbal and allowing the stick to release away from the cymbal on the upstroke.  You don’t want a different grip between your hands.  It’s simply a matter of the sound that is being produced.


A classic case of hearing mismatched hand grips is when a studio player goes from say a hi hat and snare groove to an aggressive straight 8ths snare drum roll.  The type of roll that has to be slamming, in your face and with perfectly matched hands and weight.


If your grip is inconsistent between your hands or is constantly changing you won’t be able to achieve the desired consistency.  I’d recommend

spending time with Jim Chapin’s book Stick Control.  This will really help to develop these areas.


*ANOTHER KEY ELEMENT IS STROKE WEIGHT.*


Consistent and controlled stroke weight is another key element that denotes an accomplished studio player. 


If your weight is changing from snare back beat to snare back beat or from bass drum note to bass drum note then you’ve got work to do.  Not only does that translate inside the music as erratic and uneven but it creates nightmarish issues for the mix engineer.  He is trying to create a foundation or ‘frame the house’ for the music of which you are the key element and you’re changing the level of the floors constantly.  This is a good way to picture what I’m saying. 


Consistent weight starts with good hand technique and is developed largely by being very aware of it, the problems it creates and the need for consistent weight.  It’s good to practice everything that you do bearing these key elements constantly in mind.

Share : facebooktwittergoogle plus
pinterest

Studio Drummer – Playing Technique, What Are The Microphones Hearing?

PLAYING TECHNIQUE – WHAT ARE THE MICROPHONES HEARING?

There are a number of key elements regarding technique, not just hand technique but playing technique in general that are important to the sound that you produce.


At this point I want to introduce a term that I will refer to throughout this chapter called ‘internal dynamics’. 


A drummer should look at his kit not only as a whole but also as 6 or 7 different instruments that require their own specific approach.  If you study the sound that you’re creating not only holistically but also as distinct instruments and how to improve upon those created sounds, you’ll be much further ahead.


We want to create the desired sound and consistency by maintaining the best habits we can surrounding the kit.  There are many techniques involving the hands and I don’t want to spend too much time on which particular technique you adhere to.  I am a matched grip player who occasionally uses traditional grip and perhaps you’re the same or the reverse of that. 


What I would like to address are the key elements of importance in producing the sound we want to produce.  Whether you’re traditional or matched grip you want to have a strong fulcrum in both hands. If you’re unfamiliar with that term what this means is that by grasping the stick with your thumb and the meat of your fore finger you want a strong bond to the stick at that point.


Just as a teeter-totter has a center fulcrum which is the pivot point allowing it to go up and down so you also want this in your grip. It allows you greater control and the ability to do double strokes for example.  Yet you also want the rest of the fingers on the hand to be relaxed and free to manipulate and contact the stick.

Share : facebooktwittergoogle plus
pinterest

1 2 3 4 5 6 11